Playing around with Boost.GIL
Posted 22nd May 2020 by Holger
One of the things that fascinate me about computers and algorithms is how they can turn a simple idea into artistic images. Even simple algorithms can produce unexpected outcomes. I used to experiment with algorithmic art in the past, but it never went much beyond the standard techniques that I read about on the internet. So, whatever I produced were mostly copies of other peoples ideas. I wanted to give myself a fresh start and try to come up with new and original imagery. This is going to be a process that will take some time. I am planning to first revisit the familiar techniques before moving on to more adventurous fields.
To start my journey along this path, I have decided to not rely on existing software but develop everything from scratch. So in some ways, I decided to re-invent the wheel for no other apparent reason than that I want to be in control. But I can’t really code everything from scratch. At some point, I will have to decide to rely on some solid base. Having chosen C++ as the language for my endeavour, I found Boost.GIL to be the perfect library for my purpose. It supplies an abstraction layer that allows me to work with colours and save my results in various images formats. But it doesn’t prescribe anything much else and I am free to create the images the way I want to. There are no routines to draw lines or shapes, no functions to blend layers, and no brushes. Just enough to assemble images pixel by pixel and write them to an output file.
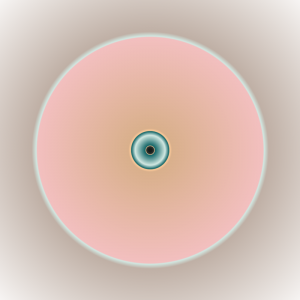
The first component I decided to create is a colour map. This component simply maps a floating-point value to a colour. Using this I created the picture on the right. I simply calculated the distance from the centre and inserted this radius into my colour map. Choosing some interesting colour stops, a set of concentric rings is created. I admit it’s probably not a masterpiece but I gave it a name anyway. I called it “Floating Point” because of its appearance and in reference to the floating-point numerics used to create it.
Leave a Reply